Tuesday, January 29, 2013

dinosaur frame

last Mother's Day, i was gifted a frame decorated by a 2 year old who didn't care to stick foam flowers and hearts on it.  i kept the frame and dug it out one day when Daddy had to work late and TV, books, puzzles or dinosaurs (again) was not an option.
The following frame was made by K using colorful sticky foam dinosaurs layered upon eachother.  I modge-podged it so they all stayed intact stuck to eachother on the frame.
Followed by two coats of white paint (it could use another coat), I have myself a sweet frame made by my Little Man comprised of his favorite "thunder lizards."

HOME

finally!
the modge podge atlas to canvas and glued letters formed my new pieces of art to spell:
H O M E
the Husband veto'd the letter "S" which would be a tribute to the Great Lakes and also the various homes we have made our own.  So, if anyone wants the letter "S" glued to an old map, let me know.


Tuesday, January 1, 2013

Canvas and Letters

in an attempt to fill the void in my empty heart as my first born is on a road trip to LA with Daddy, I started crafting.  sigh... I took some old canvases (8x10), a 2001 atlas, modge podge and wooden letters and set up shop in the living room in front of a really bad chick flick.

2+hours later, i have created the above.  first i modge podged the atlas to the canvas.  i let it dry a couple hours and then glued the letters onto the canvas.  now... i wait for it to dry.

Tuesday, May 3, 2011

Autograph Board


i put together a slideshow for Dave's party and with the photos, i created a collage on Snapfish. to order the 16x20 collage poster online was $16.99. however, to pick up at Meijer the next day, was only $7.99 so it was pretty cheap to create something for the 30-40+ guests to sign or write messages on such a special day. we happened to have the black mat and greg just had to cut it bigger to fit the collage.

i quite liked how it turned out... especially since it only took a half hour and i was able to pick it up the next morning.
Posted by Picasa

Thursday, April 28, 2011

Wire jewelry

Came across this and thought of you peeps:

Making wire jewelry

You guys might find it helpful but I have a feeling you already know a lot!

Tuesday, February 1, 2011

Batik Pillows


the batik flag ended up being a batik cushion --- that i decided i liked and kept for our couch.


K is modeling our new cushions.
Posted by Picasa

Tuesday, November 2, 2010

Batik: Part II


sooo... the next day, in hot water, rub the fabric to remove the glue and you'll be left with an image that stands out depending on the concentration of paint.


I made Tree #2 the correct way afterwards. note: i created the image AND THEN added the paint. Tree #1 was the original tree from Batik: Part I ---- i added color ON TOP of the image after the glue and paint and though you can see some color change, i don't like how it turned out.

these are gifts i'm making for the In-Law's... it's nice b/c I will be able to create an image and K can help with paint. cloth napkins, pillowcase and a framed piece of art are on the agenda.
Posted by Picasa

Batik: Part I

I discovered batik at the music festivals we've attended. It's a unique style of print where it originally consisted of coming up with an image and using hot wax to draw it out on a piece of cotton fabric. then you take colored dyes and go over the fabric and wax. peel away or somehow, gently remove the wax and the image shows up with the colors not touching the outline.


I was reading one of those Family Fun magazines and they used Elmer's blue gel glue. As i googled more into it, i found a delightful website and followed their directions which really is like the original method of batik --- except i'm using Elmer's instead of wax and acrylic paints.


i cut out my muslim fabric and used my glue to create an image. allow it to dry overnight. then, take acrylic paint and paint all over it. the more water you use with the acrylic paint gives it a more water color image which i like. the less water (or no water), you get deeper, darker colors. allow that to dry overnight.
Posted by Picasa

Artsy Fartsy


I was going for a different element when I made this... Basically, I messed up what I was initially attempting. In short, I made my image AND THEN used Elmer's blue gel glue to create those lovely visible lines and dots. When I washed it (to remove the glue), it made the image washed out and lighter. I wished I kept it like this original but there's more muslim to work on (which I found in the remnant bin at JoAnn's for $3). I'll show you what I was aiming for in another post but thought I'd share my "screw-up" which I really like.
Posted by Picasa

Saturday, September 25, 2010

Duvet Cover


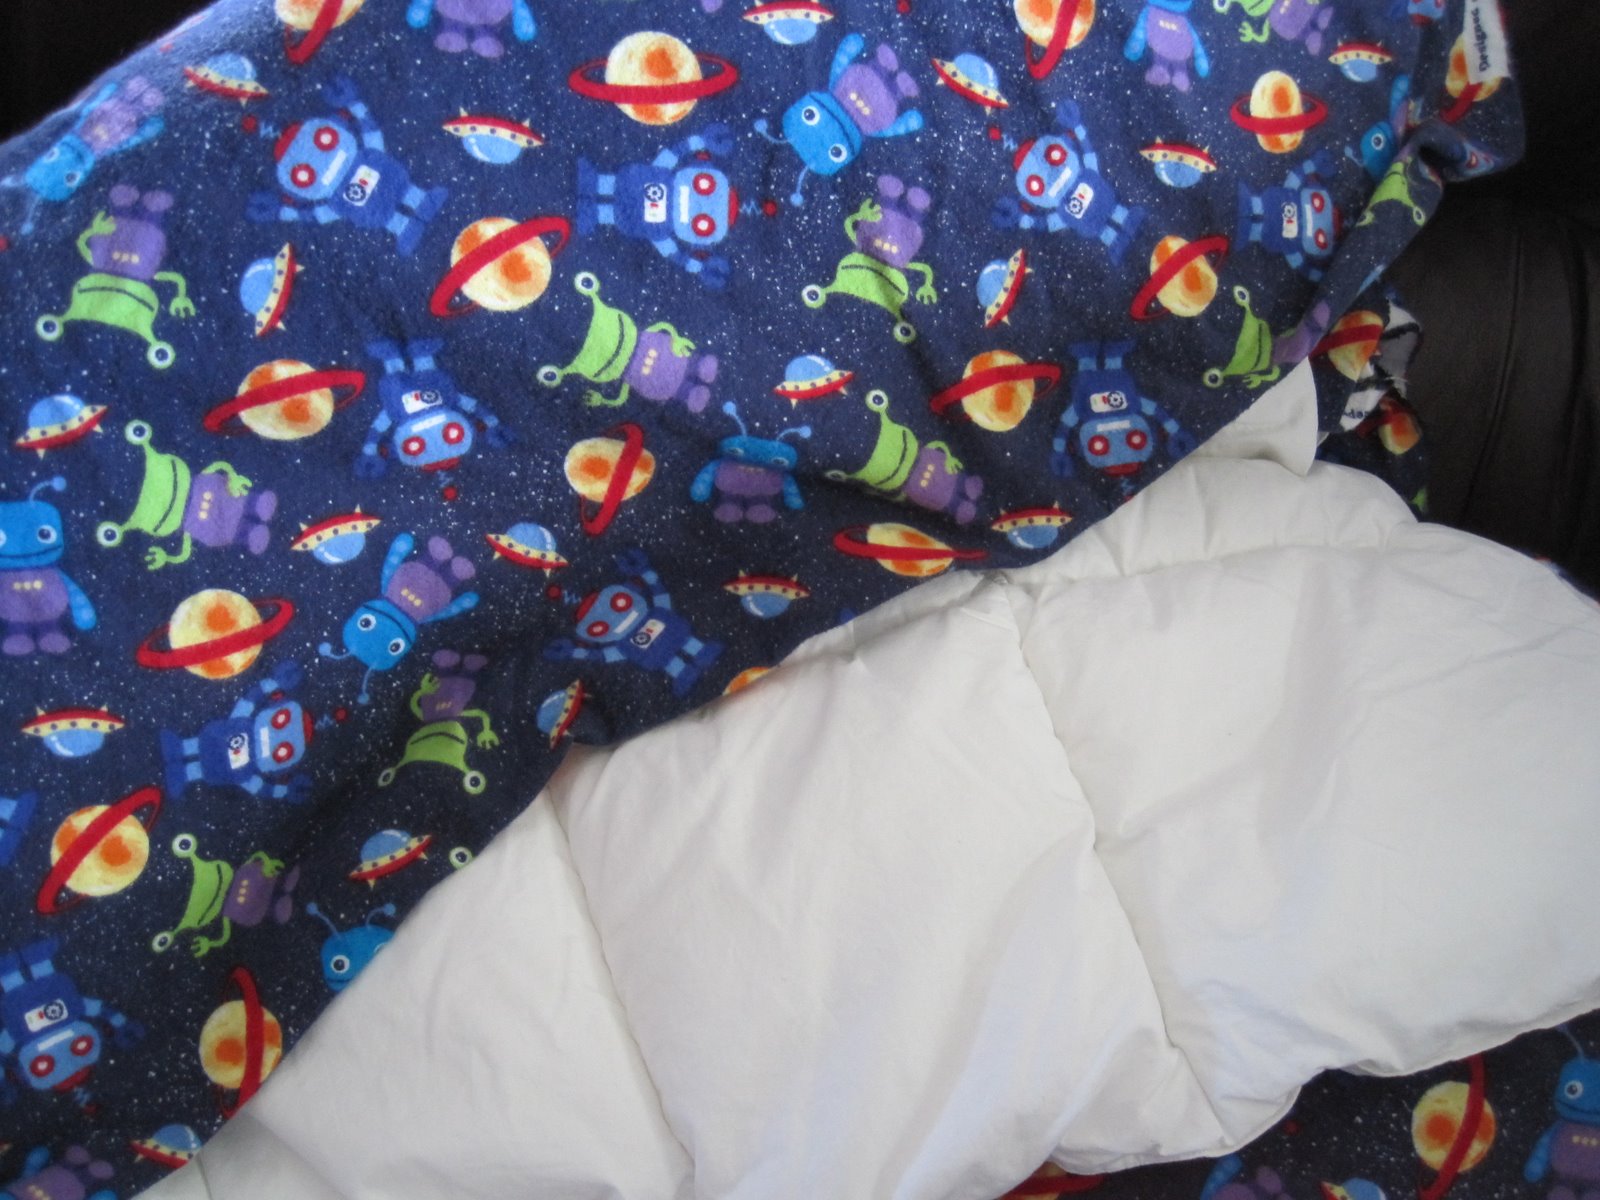
our last trip, K was gifted a thick, warm comforter from my cousin. A very thoughtful gift as this Winter won't be so kind as last year. I'm sure we're in for a TON of snow (yay) meaning the portable heater will be on in his room a lot. It was just a white blanket and I searched high and low (Target and internet) for a duvet cover. I don't care for the cars, dinosaurs, or the cowboy and sports themes.

with a JoAnn's Fabric coupon in tow, we went there one night. I looked and looked and while G meandered, he came back with a roll of this cute martian-space theme. SOOOO cute. being on sale, we couldn't use the coupon but nevertheless, 3 yards and $9 later we went home. I always wash fabrics first and then G essentially sewed a big pillowcase and we slipped the blanket in. All set for this blistery Fall and upcoming Winter...
Posted by Picasa

Saturday, July 31, 2010

Beaded Earrings

My first post :)
Trying to make good on a promise I made 5 months ago to the 6 and 8 year old daughters of my mentor, I spent yesterday making my first ever beaded earrings. Turns out it wasn't that complicated! After a two minute video from YouTube and some hand-holding from my sister, I was able to do them on my own. The hardest part is trying to figure out what beads go together.
Thanks to my grandfather's flea market deals, my mom, sister, and I inherited massive amounts of beads. There really are too many to ever use up. I mostly used beads from our stash to keep costs down. The posts and backings I bought at the bead shop.
The picture is faded out, so it's hard to get a sense of the sparkle on the crystal beads, but you get the point. If I get another free day before I leave for Texas, I'll try to make some more. Once I got going, it was fun. I hope the girls like them.

Wednesday, July 21, 2010

my farm

this end of the garden bed is extremely crowded. i may have to pull up one of the squash plants to make sure they all have ample room.

but from the bottom of the pic, stuff planted on this end of the farm are watermelons, 3 different kinds of squash, herbs (thyme, basil, parsley, sage, chives), green beans, then the tomato cage.


on the opposite end: 2 different kinds of chili (serrano and poblano), japanese eggplant, then the tomato cage.


from left to right: cherry tree, green beans, tomatoes, strawberry (never fruited), and eggplant


the vine thing growing on the dirt is watermelon. i'm pretty excited about this. i see round lil' pea-sized stuff sprouting. i hope i actually get yummy watermelon.
Posted by Picasa

poor-man's sprinkler system

not exactly "arts" nor "crafts." but since i haven't really gotten around to unpacking any of my beading stuff, i've been using all my creative juices thinking, planning, and executing lil' projects that improve my garden.

this is a project i finished in about 12 hours, but spread out in 3 weekends. lotsa time was spent at the irrigation aisle at OSH, examining lil' drippers, sprinklers, tubes, etc.

anyway, i got a 4-port battery-operated digital timer. eventually, when i have a bigger garden, i can set it up for 4 zones. right now, all the garden beds in the backyard is being watered in 2 zones.
the roses are on individual drippers, rather than sprinklers, because i hear that moisture leads to fungus (which i've also worked very hard to save my roses from!).
my backyard now has a bunch of black hoses all over the place. not exactly pretty, but my plants have been sooo happy since i put this in.


i've got the "farm" (where all my edible stuff are planted) on sprinklers.

Monday, June 7, 2010

Belly Cast II


Posted by Picasa


for some reason, i can't see the images posted (just the html) but it's pretty self-explanatory. remember the cast of my belly when i was about to pop? i did about 3 weeks later. back in April, we finally got around to painting it with the same shade of blue-gray as the bathroom. then, out came our "collection" of fortunes we've been storing in an orange vase for about 5 years from all of our eating out at Chinese restaurants (Wyoming, Wisconsin, Michigan and perhaps a few from Cali). with the help of modge podge, i'm delighted to present our little fortune cookie belly cast... TA DA!

Friday, February 26, 2010

pink and black for bernice

bernice (joe's momma) requested a while ago that i make her a black and pink necklace. she's very good with the sewing machine and she was in the process of making herself a pink jacket/blazer to wear when she and the poodles compete in dog shows. i tried to make her something in time for christmas, but i just could't make it work. yesterday was her bday, so these will be shipped to her as a belated bday present.

other than the colors, she really made no other requests as far as style or length or anything else. so i decided to make her two.


i'm about to get really busy, so these will prolly be my last project for a long time.
for now, i saw adieu to beading.
Posted by Picasa

Thursday, February 18, 2010

mom's bday gift -- garden necklace

i posted the pattern 2 posts ago. the instruction calls for repeating the squirrly triangle pattern all the way to the end (clasps). but dixie from work said that, as originally designed, this necklace tends to twist around the neck. she suggested that i leave the back part as just a simple, straight string of beads. she said this would prevent the necklace from twisting. i also made a simple bracelet.

anyway, today (the 18th) is my mom's bday so i rushed to finish these. i'll have to write her an IOU note for a pair of earrings.

Posted by Picasa

wine charms

these were gifted to the heysteks


and these were gifted to joe.
he picked the charms himself.
Posted by Picasa

Friday, February 5, 2010

the beginning of a necklace

can you see where i'm going with this?

dixie at work (the lady who taught me, charlyn, and others some basic beading) makes a lot of these and i always thought they were pretty. i found the pattern online and i decided to make one for my mom's bday in a few weeks.

the birthstone for february is amethyst (those violet crystals) and i really like the mauvey pearls. other than than, i'm not completely sold on the color combination. i'm thinking of maybe changing the cream seed beads into something that blends in with the colors, as opposed to contrasting/complementing. maybe light pink or violet.

there's definitely a learning curve with this project. at first, i thought i was weaving them too loosely. so i tugged on the string a lot more. now, it feels kinda stiff, like i did it too tightly. maybe now's a good time to start over.

i've only done 2-3 inches but it took me an hour. oooh, how my back will hurt by the end of this.


Posted by Picasa

Monday, January 18, 2010

blue and light amethyst

these were made for a birthday present.

blue (and red veins, but mostly blue) beads are alternated with light amethyst rondelles and tiny swarovski pearls. the three big crystals in the middle are swarovski "cosmic" beads in light amethyst.


i'm pretty happy with how these turned out. if i were to change one thing, though, i might go with a bigger contrast in color. instead of a the light purple accents, maybe i might try a really deep/bright purple. or red.

or i dunno, maybe this way is better.
more experimentation!!!
Posted by Picasa

Sunday, January 10, 2010

barrettes v2

these were gifted to my hair-accesories-fiend friend, dayni.

same technique that was used on the facebook bobby pins: 26 gauge wire, wrapped around the hair clip between beads .

used a different kind of barrettes -- these are the ones that lock. undecorated ones can be found at any craft store.

top one was randomly decorated with glass beads in browns, golds, and beiges.

the second one was better planned -- 8mm czech fire polished beads with different colored freshwater pearls.


Posted by Picasa