Tuesday, February 1, 2011

Batik Pillows


the batik flag ended up being a batik cushion --- that i decided i liked and kept for our couch.


K is modeling our new cushions.
Posted by Picasa

Tuesday, November 2, 2010

Batik: Part II


sooo... the next day, in hot water, rub the fabric to remove the glue and you'll be left with an image that stands out depending on the concentration of paint.


I made Tree #2 the correct way afterwards. note: i created the image AND THEN added the paint. Tree #1 was the original tree from Batik: Part I ---- i added color ON TOP of the image after the glue and paint and though you can see some color change, i don't like how it turned out.

these are gifts i'm making for the In-Law's... it's nice b/c I will be able to create an image and K can help with paint. cloth napkins, pillowcase and a framed piece of art are on the agenda.
Posted by Picasa

Batik: Part I

I discovered batik at the music festivals we've attended. It's a unique style of print where it originally consisted of coming up with an image and using hot wax to draw it out on a piece of cotton fabric. then you take colored dyes and go over the fabric and wax. peel away or somehow, gently remove the wax and the image shows up with the colors not touching the outline.


I was reading one of those Family Fun magazines and they used Elmer's blue gel glue. As i googled more into it, i found a delightful website and followed their directions which really is like the original method of batik --- except i'm using Elmer's instead of wax and acrylic paints.


i cut out my muslim fabric and used my glue to create an image. allow it to dry overnight. then, take acrylic paint and paint all over it. the more water you use with the acrylic paint gives it a more water color image which i like. the less water (or no water), you get deeper, darker colors. allow that to dry overnight.
Posted by Picasa

Artsy Fartsy


I was going for a different element when I made this... Basically, I messed up what I was initially attempting. In short, I made my image AND THEN used Elmer's blue gel glue to create those lovely visible lines and dots. When I washed it (to remove the glue), it made the image washed out and lighter. I wished I kept it like this original but there's more muslim to work on (which I found in the remnant bin at JoAnn's for $3). I'll show you what I was aiming for in another post but thought I'd share my "screw-up" which I really like.
Posted by Picasa

Saturday, September 25, 2010

Duvet Cover


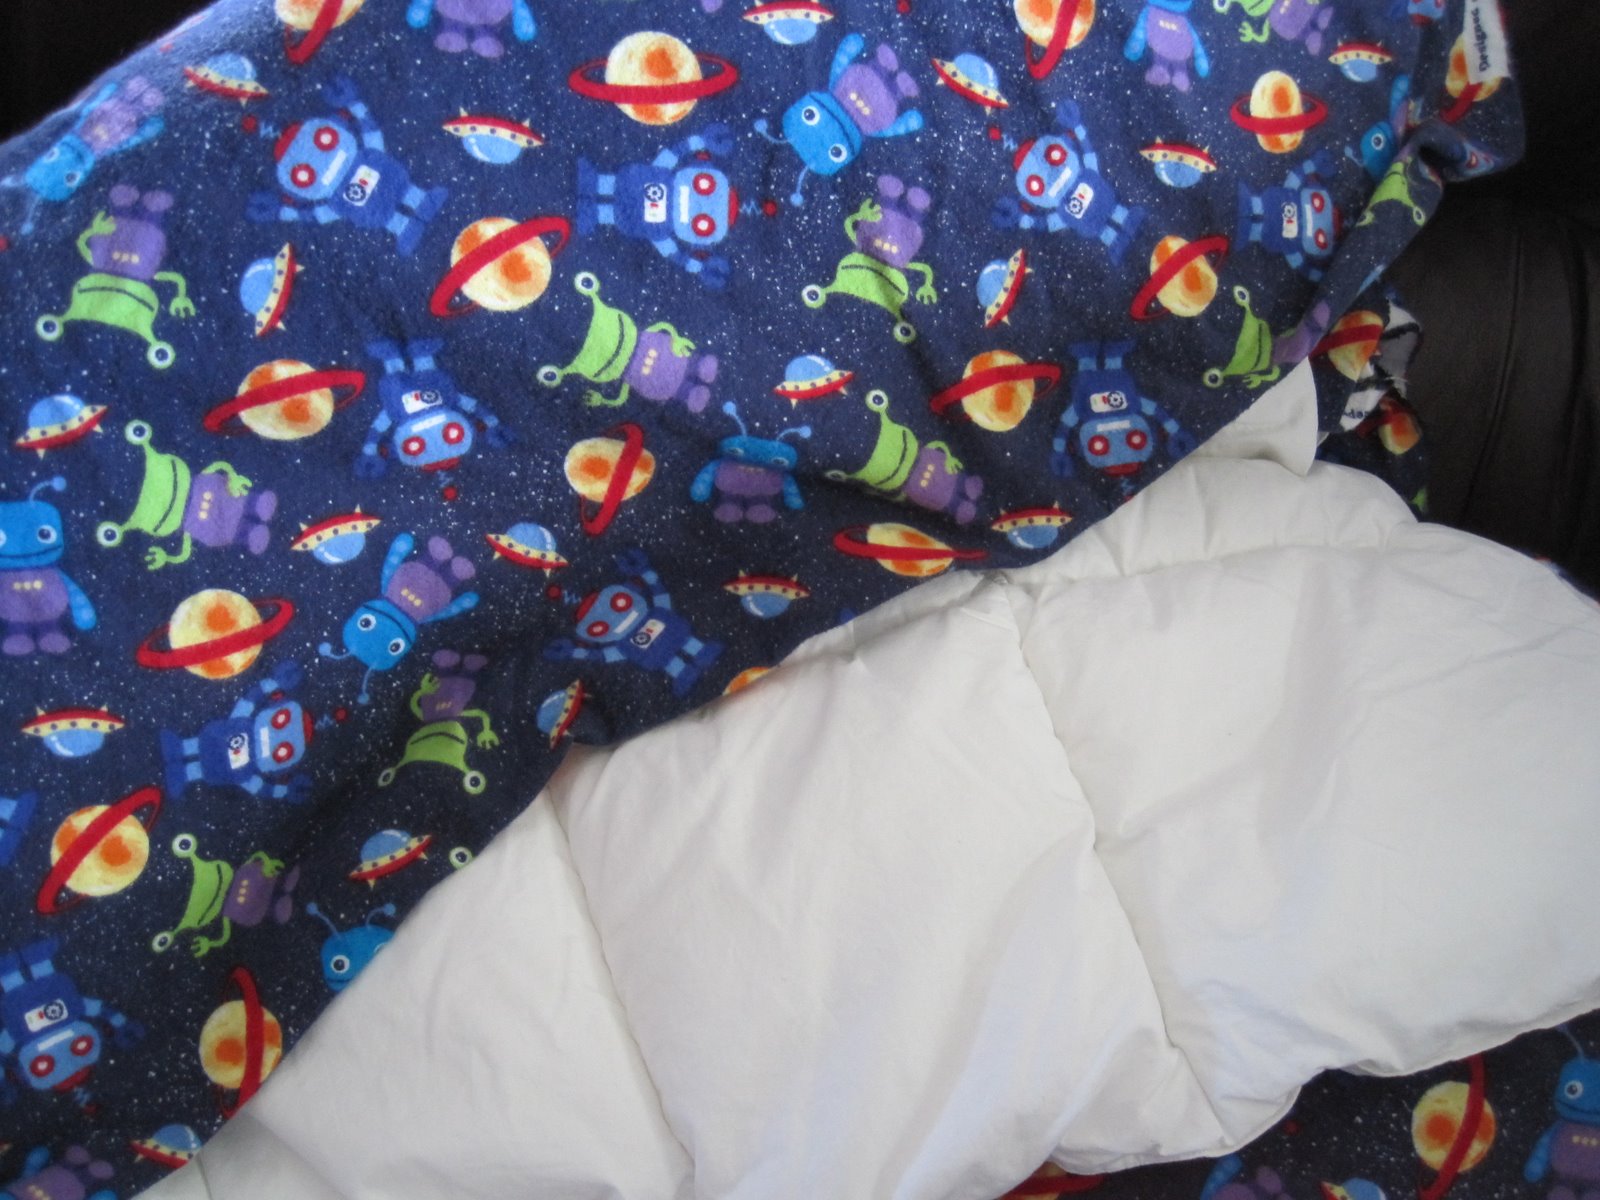
our last trip, K was gifted a thick, warm comforter from my cousin. A very thoughtful gift as this Winter won't be so kind as last year. I'm sure we're in for a TON of snow (yay) meaning the portable heater will be on in his room a lot. It was just a white blanket and I searched high and low (Target and internet) for a duvet cover. I don't care for the cars, dinosaurs, or the cowboy and sports themes.

with a JoAnn's Fabric coupon in tow, we went there one night. I looked and looked and while G meandered, he came back with a roll of this cute martian-space theme. SOOOO cute. being on sale, we couldn't use the coupon but nevertheless, 3 yards and $9 later we went home. I always wash fabrics first and then G essentially sewed a big pillowcase and we slipped the blanket in. All set for this blistery Fall and upcoming Winter...
Posted by Picasa

Saturday, July 31, 2010

Beaded Earrings

My first post :)
Trying to make good on a promise I made 5 months ago to the 6 and 8 year old daughters of my mentor, I spent yesterday making my first ever beaded earrings. Turns out it wasn't that complicated! After a two minute video from YouTube and some hand-holding from my sister, I was able to do them on my own. The hardest part is trying to figure out what beads go together.
Thanks to my grandfather's flea market deals, my mom, sister, and I inherited massive amounts of beads. There really are too many to ever use up. I mostly used beads from our stash to keep costs down. The posts and backings I bought at the bead shop.
The picture is faded out, so it's hard to get a sense of the sparkle on the crystal beads, but you get the point. If I get another free day before I leave for Texas, I'll try to make some more. Once I got going, it was fun. I hope the girls like them.

Wednesday, July 21, 2010

my farm

this end of the garden bed is extremely crowded. i may have to pull up one of the squash plants to make sure they all have ample room.

but from the bottom of the pic, stuff planted on this end of the farm are watermelons, 3 different kinds of squash, herbs (thyme, basil, parsley, sage, chives), green beans, then the tomato cage.


on the opposite end: 2 different kinds of chili (serrano and poblano), japanese eggplant, then the tomato cage.


from left to right: cherry tree, green beans, tomatoes, strawberry (never fruited), and eggplant


the vine thing growing on the dirt is watermelon. i'm pretty excited about this. i see round lil' pea-sized stuff sprouting. i hope i actually get yummy watermelon.
Posted by Picasa